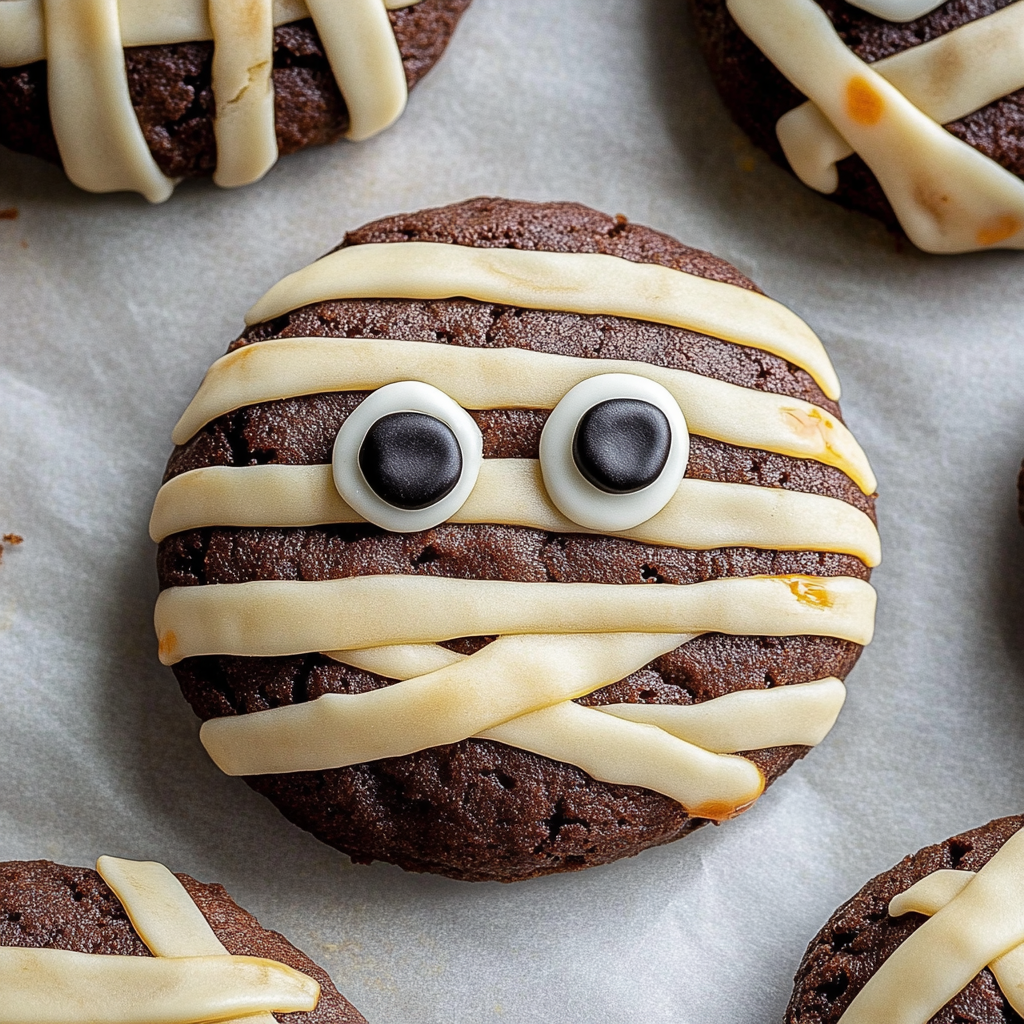
As the autumn leaves twirl and dance to the ground, there’s an undeniable excitement in the air. Halloween is creeping up like a ghost in the night, bringing with it the sweet promise of treats and delightful frights. And what better way to celebrate than with Halloween Mummy Cookies? Picture this: soft, chewy cookies that look like adorable little mummies, complete with candy eyes peeking through their sugary wraps. Festive cookie decoration ideas Just thinking about them makes my heart race with excitement!
Jump to:
- <strong>Essential Ingredients</strong>
- <strong>Let’s Make it Together</strong>
- <strong>Perfecting the Cooking Process</strong>
- <strong>Add Your Touch</strong>
- <strong>Storing & Reheating</strong>
- <strong>FAQ</strong>
- Can I use store-bought cookie dough?
- How do I make the icing look like bandages?
- What’s the best way to decorate these cookies?
- 📖 Recipe Card
These cookies are not just a feast for the eyes; they’re also a symphony of flavors. With a hint of vanilla and a touch of chocolate, each bite is like a warm hug on a chilly October evening. Spooky red velvet cookies Whether you’re hosting a spooky party or simply looking for a fun family activity, making Halloween Mummy Cookies will bring joy and laughter to everyone involved.
Why You'll Love This Recipe
- These Halloween Mummy Cookies are incredibly easy to make, perfect for all ages
- The delightful combination of flavors will have everyone coming back for more
- Their spooky yet charming appearance makes them a hit at any Halloween gathering
- Plus, you can easily customize them with different candies and toppings!
I remember the first time I made these cookies; my niece’s eyes lit up brighter than any jack-o’-lantern when she saw them on the table. We had an impromptu cookie decorating contest that turned into flour-covered giggles and sticky fingers all around.
Essential Ingredients
Here’s what you’ll need to make this delicious dish:
- All-Purpose Flour: Essential for creating that perfect cookie texture; use unbleached flour for the best results.
- Granulated Sugar: This sweetener provides that classic cookie sweetness; don’t skimp on it!
- Baking Soda: Helps your cookies rise perfectly; make sure it’s fresh for optimal results.
- Salt: A pinch enhances sweetness and balances flavors beautifully; don’t skip it!
- Butter: Use unsalted butter for control over salt levels; soften it before mixing for easier blending.
- Eggs: Two large eggs add moisture and richness; bring them to room temperature for best results.
- Vanilla Extract: A splash of pure vanilla brings warmth and depth to your cookies; always opt for pure over imitation.
- Chocolate Chips: Semi-sweet chocolate chips create delightful pockets of gooeyness throughout each cookie; feel free to mix in some white chocolate chips too!
- Candy Eyes: These fun little decorations are essential for giving your mummies character; you can find them at craft stores or online.
- White Candy Melts or Icing: Used to create the mummy wraps; melted candy melts work wonderfully here!
The full ingredients list, including measurements, is provided in the recipe card directly below.

Let’s Make it Together
Preheat Your Oven : Start by preheating your oven to 350°F (175°C). Line two baking sheets with parchment paper to prevent sticking.
Mix Dry Ingredients : In a large bowl, whisk together the flour, baking soda, and salt until well combined. This step ensures even distribution of leavening agents throughout your cookies.
Cream Butter and Sugar : In another bowl, cream together softened butter and granulated sugar until light and fluffy. The mixture should appear pale in color and have a smooth texture—this takes about 2-3 minutes.
Add Eggs and Vanilla : Beat in the eggs one at a time along with the vanilla extract until fully incorporated. The batter should become silky smooth as you mix—this is where the magic begins!
Combine Wet and Dry Ingredients : Gradually add the dry ingredients into your wet mixture while stirring gently until just combined. Be careful not to overmix—your cookies will thank you later!
Add Chocolate Chips : Fold in those semi-sweet chocolate chips until evenly distributed throughout your dough. This step adds pockets of gooey goodness that everyone will love.
Scoop and Bake : Using a cookie scoop or spoon, drop tablespoons of dough onto your prepared baking sheets, spacing them about 2 inches apart. Bake for 10-12 minutes until edges turn golden brown but centers remain soft.
Create Mummy Wraps : Once cooled slightly, melt white candy melts according to package instructions. Drizzle melted candy over each cookie in a zigzag pattern to create mummy wraps—don’t forget those candy eyes!
Enjoy these delightful Halloween Mummy Cookies fresh from the oven or store them in an airtight container for later treats! They’re sure to become a favorite tradition as you gather around with friends and family during this spooktacular season. Caramel and chocolate treats.
You Must Know
- These Halloween Mummy Cookies are not just spooky; they are irresistibly delicious and delightfully fun to make
- The perfect blend of chocolate and vanilla flavors will have everyone coming back for seconds
- Plus, they make for an adorable Halloween treat that kids will love!
Perfecting the Cooking Process
To create the best Halloween Mummy Cookies, start by preheating your oven to 350°F. Mix your ingredients thoroughly before rolling out the dough and cutting it into cookie shapes. Fun cookie dough twists Bake until golden brown for perfect results.
Add Your Touch
Feel free to swap out chocolate chips for butterscotch or peanut butter chips. You can also add spooky sprinkles for a festive touch or use colored icing to personalize your cookies even more. For more inspiration, check out this double chocolate cookies recipe.
Storing & Reheating
Store your Halloween Mummy Cookies in an airtight container at room temperature for up to a week. If reheating, pop them in the microwave for about 10-15 seconds for that fresh-baked feel. For more inspiration, check out this thick and chewy cookies recipe.
Chef's Helpful Tips
- When making these cookies, ensure your butter is softened for easy mixing
- Don’t overbake them; they should be slightly soft when you take them out
- Allow cooling on the baking sheet briefly before transferring them to a wire rack
Making these cookies reminds me of the time my niece insisted we have a “spooky cookie party.” We ended up covered in flour and giggles, and those cookies were devoured faster than I could say “mummy!”
FAQ
Can I use store-bought cookie dough?
Absolutely! Store-bought dough saves time while still delivering delightful Halloween Mummy Cookies.
How do I make the icing look like bandages?
Use a piping bag with a small tip to drizzle white icing over cooled cookies for that mummy look.
What’s the best way to decorate these cookies?
Get creative! Use candy eyes and drizzled icing to bring your mummies to life!
Did You Enjoy Making This Recipe? Please rate this recipe with ⭐⭐⭐⭐⭐ or leave a comment.
📖 Recipe Card
Print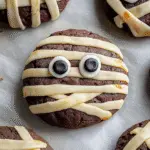
Halloween Mummy Cookies
- Total Time: 27 minutes
- Yield: Approximately 24 cookies 1x
Description
Halloween Mummy Cookies are a fun and festive treat perfect for celebrating the spooky season! These soft, chewy cookies are designed to resemble adorable mummies, complete with candy eyes peeking through sugary wraps. With delightful hints of vanilla and chocolate, they make for a charming addition to any Halloween gathering or family activity. Easy to make and customize, these cookies will bring joy and laughter to your festivities!
Ingredients
- 2 1/4 cups all-purpose flour
- 1 cup granulated sugar
- 1 tsp baking soda
- 1/2 tsp salt
- 1 cup unsalted butter, softened
- 2 large eggs, room temperature
- 1 tsp vanilla extract
- 1 cup semi-sweet chocolate chips
- Candy eyes (for decoration)
- 1 cup white candy melts or icing (for mummy wraps)
Instructions
- Preheat your oven to 350°F (175°C) and line two baking sheets with parchment paper.
- In a bowl, whisk together flour, baking soda, and salt.
- In another bowl, cream the softened butter and sugar until light and fluffy.
- Beat in eggs one at a time, followed by vanilla extract until smooth.
- Gradually mix dry ingredients into the wet mixture until just combined.
- Fold in chocolate chips evenly throughout the dough.
- Scoop tablespoons of dough onto prepared baking sheets, spacing them about 2 inches apart.
- Bake for 10-12 minutes until edges turn golden brown but centers remain soft.
- After cooling slightly, drizzle melted white candy over each cookie in a zigzag pattern and add candy eyes.
- Prep Time: 15 minutes
- Cook Time: 12 minutes
- Category: Dessert
- Method: Baking
- Cuisine: American
Nutrition
- Serving Size: 1 cookie (30g)
- Calories: 150
- Sugar: 10g
- Sodium: 90mg
- Fat: 7g
- Saturated Fat: 4g
- Unsaturated Fat: 2g
- Trans Fat: 0g
- Carbohydrates: 20g
- Fiber: <1g
- Protein: 2g
- Cholesterol: 20mg
